When you’re starting to record vocals, the first step is choosing the right microphone that suits your voice. Whether you opt for a condenser microphone for its detailed sound or a dynamic one for handling louder performances, your choice will greatly impact the final product. Set the microphone at the correct height and use a pop filter to reduce plosive sounds. But that’s just scratching the surface. Next, you’ll need to think about your recording environment and how to address it acoustically to guarantee the best sound quality. Ready to take your vocal recordings to the next level? Let’s explore further.
TL-DR
- Use a condenser microphone with a cardioid polar pattern for detailed and focused vocal capture.
- Position the microphone at mouth level and use a pop filter to reduce plosive sounds.
- Select a quiet room with good acoustics, away from noise sources and reflective surfaces.
- Perform vocal warm-ups and practice deep breathing techniques before recording.
- Edit and mix vocals with EQ, compression, and effects for a polished final track.
Equipment Essentials
To achieve high-quality vocal recordings, you’ll need to invest in the right equipment essentials. For recording vocals at home, start with a good microphone. Condenser microphones are often favored for their sensitivity and ability to capture detailed sound. Models like the Rode NT1A are excellent choices for beginners.
An audio interface is essential. This device connects your microphone to your computer, ensuring professional-grade sound quality. The interface converts the analog signal from your mic into a digital format that your computer can process.
USB microphones offer a convenient and important alternative. They plug directly into your computer, making them ideal for simpler setups.
Microphone placement has a significant impact on recording quality. Experiment with distances and angles to find the sweet spot for your unique voice. High-frequency clarity is crucial, so make sure your mic is capturing those nuances.
Dynamic mics like the Shure SM58 are also popular, especially for live performances, but they can be used for home recording too. Consider the polar patterns of your microphone—these dictate how sound is picked up from different directions, which is important for achieving the best vocal recordings.
Choosing Your Space
After securing the right equipment, it’s equally important to choose a space with minimal background noise and good acoustics for clear vocal recordings.
Start by selecting a room away from noisy areas like streets, appliances, or other potential distractions. Your recording space should be as quiet and isolated as possible to capture the best sound quality.
Next, focus on the acoustics of the room. Bare walls can cause unwanted reflections and echoes that interfere with your vocal performance. To combat this, use sound-absorbing materials such as acoustic panels, foam, or even thick blankets. These materials help to dampen any excess sound and create a more controlled recording environment.
Pay attention to the microphone position as well. Place the microphone away from walls and corners to reduce reflections and ensure a clean recording. Experiment with different placements to find the spot that captures your vocals most effectively.
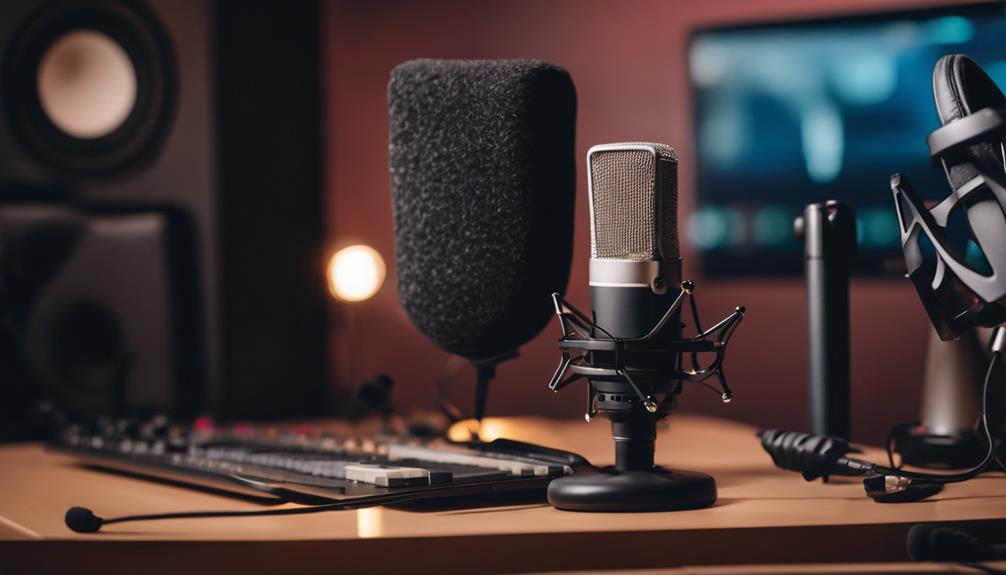
Microphone Setup

Setting up your microphone correctly is essential for capturing high-quality vocal recordings. Start by choosing the right microphone type for your vocals. Condenser microphones are great for capturing detailed and nuanced performances, while dynamic microphones are more robust and handle louder vocals well.
Place your microphone on a sturdy microphone stand to guarantee stability throughout your recording session. Adjust the microphone height so it’s level with your mouth. This helps capture balanced frequencies and minimizes unwanted noise. The microphone’s polar pattern is vital—select cardioid for focused sound or omnidirectional for a more natural room ambiance.
Rotate the microphone’s axis to find the best sound capture angle for your voice. Incorporate a pop filter between the microphone and your mouth to reduce plosive sounds, which can distort your recording. Your recording space also plays a role; experiment with different placements within your home studio to achieve a professional sounding vocal track.
Find the sweet spot where your vocals sound best and are free from reflections or unwanted noise.
Acoustic Treatments
Improving your recording space with acoustic treatments is essential for achieving professional-quality vocal recordings. Acoustic treatments enhance sound quality by reducing reflections and controlling reverberation in your recording space. By addressing these issues, you can capture clearer and more precise vocal recordings.
Start by incorporating acoustic panels. These panels come in various thicknesses and densities to target specific frequency ranges, optimizing sound absorption. Proper placement of these panels will help eliminate room resonances, standing waves, and flutter echoes, all of which can muddy your recordings.
Next, consider adding bass traps in the corners of your room. Bass traps are vital for absorbing low-frequency energy that tends to build up in these areas, preventing boomy and unclear recordings.
Diffusers are another excellent addition, as they scatter sound waves evenly throughout the room, creating a more balanced acoustic environment.
Recording Techniques

Mastering proper recording techniques is essential for capturing clear and professional-sounding vocals. Start by selecting the best vocal microphones for your needs. Condenser mics are a popular choice because they pick up sound with incredible detail, making them ideal for studio recordings. Experiment with different types of microphones to find which one suits your voice best.
When you’re ready to record your vocals, position the microphone correctly. Adjusting the microphone’s polar pattern can help focus on the direct sound and minimize background noise. Using a pop shield is critical as it reduces plosive sounds, ensuring a clean recording.
Your recording environment also plays a significant role. Monitor vocals through headphones to prevent external noise interference. This helps you focus on the vocalist’s performance and make necessary adjustments in real time. Be mindful of the recording levels; keep them in check to avoid clipping and distortion, which can ruin a good vocal track.
Experiment with microphone placement to achieve the best balance. Sometimes, small adjustments can make a big difference in achieving a professional sound. By carefully considering these factors, you’ll be well on your way to capturing high-quality vocal recordings.
Vocal Performance Tips
To deliver an outstanding vocal performance, focus on staying relaxed and confident during your recording sessions. Begin with consistent vocal warm-ups to prepare your voice and prevent strain. These exercises will help you optimize your vocal range and guarantee a smooth start to your session.
Practice deep breathing techniques to maintain control over your vocal delivery. Proper breathing allows you to sustain notes effectively and manage your airflow, which can make a significant difference in the quality of your performance.
Additionally, singing with emotion and expression is vital. It’s not just about hitting the right notes; it’s about connecting with your audience and conveying the song’s message.
Having a vocal recording checklist can be incredibly helpful. This list should include reminders for deep breathing techniques, vocal warm-ups, and any specific goals for your vocal delivery. Checking off these items can help you stay focused and organized throughout the vocal recording session.
Post-Recording Process

Once you’ve nailed your vocal performance, the post-recording process guarantees your recording shines. Start by editing vocals to remove mistakes and unwanted noise. Adjusting timing is important to make sure everything is in sync.
Next, move on to mixing vocals. Here, you’ll apply EQ to balance frequencies, use compression to control dynamics, and add reverb or other effects to blend your vocals seamlessly into the track.
Finalizing vocals involves a meticulous listening session. You want to catch any remaining imperfections and make necessary adjustments. Once you’re satisfied, export the final track in your desired format. Don’t forget to save backups of your project files frequently. This step is essential to prevent data loss and safeguard your hard work.
Afterward, consider sharing vocal recordings with others for feedback or collaboration. This can also help you showcase your talent to a wider audience. Platforms like SoundCloud or YouTube are excellent for this purpose.
Next up, learn how to setup a home studio in this guide.