When you start mixing and mastering your music, you’ll find that these stages are pivotal in transforming raw recordings into polished tracks. Begin by organizing your audio files and setting up your digital audio workstation effectively. Adjust volume levels, apply EQ, and use compression to achieve a balanced mix. As you move on to mastering, focus on correcting imperfections and ensuring consistency across all tracks. But how do you know which tools to use and when? Let’s break down the essential steps and techniques that will elevate your music from good to exceptional.
TL-DR
- Organize and clean up tracks in your DAW for an efficient workflow.
- Adjust volume levels and panning to create a well-balanced mix.
- Use EQ and compression to shape tonal balance and control dynamics.
- Add reverb and delay for depth without compromising clarity.
- Apply final mastering tweaks to ensure tonal balance and loudness consistency.
What Is Mixing and Mastering

Mixing and mastering are vital stages in music production that guarantee your tracks sound polished and professional. Mixing involves blending individual audio tracks to create a cohesive and balanced sound. During this process, you adjust levels, panning, EQ, effects, and dynamics to make sure each element of your track contributes effectively to the final sound.
Mastering, on the other hand, is the final stage in music production. This step polishes the overall mix, correcting any remaining imperfections and ensuring consistency across various playback systems. The goal of mastering is to enhance the entire track, focusing on tonal balance, loudness optimization, and error checking.
When you mix your music, you’re essentially working to blend and balance the individual components within the song. Once mixing is complete, mastering takes your audio to the next level. It ensures your final master sounds refined and professional, ready for distribution.
Both mixing and mastering occur within a Digital Audio Workstation (DAW) and are indispensable for enhancing the audio quality of your tracks. Understanding these processes is essential for producing music that stands out and resonates well with listeners.
Tools for Mixing and Mastering
To achieve professional-sounding tracks, you’ll need the right tools for both mixing and mastering. Studio monitors and headphones are essential; they let you accurately listen and evaluate your music. This step is vital because every mix needs a clear representation of how it sounds across different playback systems.
Your Digital Audio Workstation (DAW) is another indispensable tool. Programs like Pro Tools, Logic Pro, and Ableton Live provide the necessary platform to mix and master your tracks. Within these DAWs, you’ll find essential tools like EQ (equalization) and compressors. EQ helps you adjust the frequency balance, ensuring no part of the track sounds too muddy or too sharp. Compressors help manage the dynamic range, making sure your music sounds cohesive and polished.
Plugins and software such as Waves, FabFilter, and iZotope offer a wide range of effects and processors. These tools enhance your mix, adding clarity and depth to your sounds.
Step-by-Step Workflow
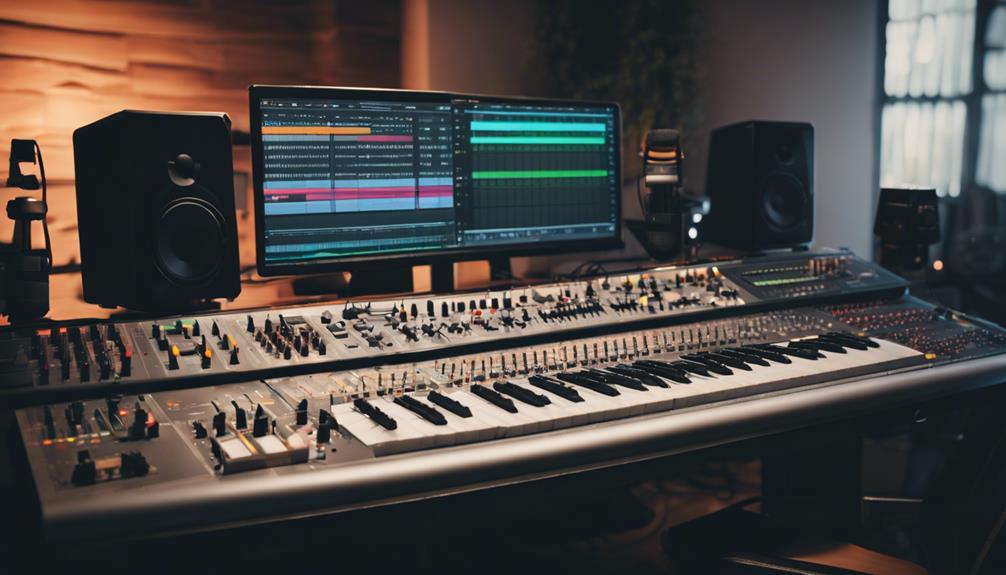
To get started with mixing, you’ll first want to organize your audio tracks in your DAW for easy access.
Next, use volume faders to balance the levels, ensuring a cohesive sound before applying EQ and compression for better clarity and punch.
Preparing Your Tracks
Organizing and fine-tuning your tracks before mixing sets the foundation for a smooth and efficient workflow. Start by labeling and color-coding each of your individual tracks in your Digital Audio Workstation (DAW). This makes navigation easier and helps you stay organized.
Next, check for any unwanted noise, clicks, or pops in the recordings and clean them up to avoid digital distortion later on. Apply a high pass filter to remove any unnecessary low frequencies that could muddy your mix. This is especially vital for non-bass instruments.
Use EQ and compression to shape the tonal balance and dynamic range of each track. For instance, EQ can help you carve out space for each instrument, while compression can provide gain reduction to control volume peaks. Pay close attention to your stereo track setup.
Properly panning and setting levels will ensure a well-balanced mix. Use high-quality studio monitors or headphones to listen critically and make adjustments. Fine-tuning your individual tracks at this stage will make the rest of the mixing process much smoother and more effective, setting you up for a polished final product.
Balancing Volume Levels
Start by setting the volume levels of each track so they blend seamlessly and create a cohesive mix. This initial step is vital for guaranteeing that no single element overpowers the others.
Follow this step-by-step workflow to balance your volume levels effectively:
- Adjust Volume Levels: Begin by adjusting the volume levels of individual tracks. Make sure to listen carefully and tweak each track until they complement each other.
- Use a Reference Track: Select a professionally mixed track in a similar genre as your reference. Comparing your mix to this track will help maintain consistency and make certain your volume levels are on point.
- Employ Automation Tools: Utilize automation tools in your DAW to dynamically control volume changes. This is especially useful for tracks that vary in intensity, allowing you to maintain a balanced mix throughout.
- Monitor Peak Levels: Keep an eye on peak levels to avoid clipping and distortion. Regularly check your meters and make adjustments as needed to ensure your mix stays clean and clear.
Final Touches & Export
Once your volume levels are balanced, it’s time to add the final touches to your mix and prepare for export. Start by incorporating fades and crossfades to guarantee smooth shifts between tracks. Use automation to control volume levels and effects parameters dynamically throughout the song. This will help create a more engaging and polished mix.
Next, revisit your EQ adjustments. Listen critically for any frequencies that might still need tweaking. Small changes can make a big difference in the clarity and overall balance of your mix. Don’t forget to make any last-minute compression tweaks to secure consistent dynamics across the track.
Check your effects adjustments too. Make sure reverb, delay, and other effects are sitting well in the mix and not overpowering any elements. Pay particular attention to the balance between wet and dry signals.
Before you export, set the appropriate levels for the final mixdown. Aim to prevent clipping and ensure a balanced sound.
When you export, choose the desired file format (e.g., WAV, MP3) and set the correct sample rate and bit depth. Finally, label your exported file accurately, including metadata like track name, artist, and album info for easy organization and identification.
Beginner Tips
Understanding the fundamentals of mixing and mastering is essential for any aspiring audio engineer aiming to create professional-quality tracks. Here are some beginner tips to get you started on the right track:
- Understand the Mixing Process:
Begin by learning the basics of EQ, compression, and reverb. These tools are vital for shaping your sound. EQ helps you carve out frequencies to avoid clashing, compression controls dynamics for a more consistent volume, and reverb adds space to your mix.
- Use Reference Tracks:
Always compare your mix to professionally mastered tracks. Reference tracks provide a benchmark for quality and help you identify areas that need improvement. They’re invaluable for achieving a balanced mix.
- Focus on Critical Listening Skills:
Train your ear to detect issues like muddiness, distortion, and lack of clarity. Critical listening skills are crucial for making precise adjustments during the mixing process. This will also help you understand what a mastering engineer looks for when finalizing a track.
- Achieve a Balanced Mix:
Make sure that your vocals, instruments, and effects are well-balanced. Every element should have its space without overpowering others. This takes practice, but it’s essential for a professional sound.
Advanced Techniques
When you’re ready for advanced techniques, start by focusing on dynamic range control to guarantee your mix has both punch and clarity.
Next, precision in stereo imaging will help you create a more immersive sound experience.
Dynamic Range Control
Mastering dynamic range control techniques like multiband compression and sidechain compression can greatly enhance the clarity and balance of your mix. When you use these advanced methods, you’ll be able to manage different frequency ranges independently, ensuring that each element of your mix has its space and presence.
Here are some key techniques to focus on:
- Multiband Compression: This allows you to control different frequency ranges independently. By compressing specific bands, you can enhance clarity and balance without affecting the entire mix.
- Sidechain Compression: Use this to prioritize certain elements, allowing key instruments to stand out. It’s especially useful for creating space in the mix, ensuring that no single element overpowers the others.
- Parallel Compression: This technique blends compressed and uncompressed signals, adding depth and intensity. It’s perfect for maintaining natural dynamics while giving your mix a punch.
- Upward Compression and Expansion Techniques: Use upward compression to boost softer passages, preserving natural dynamics, and employ expansion techniques to increase the dynamic range, creating impactful moments in your mix.
Stereo Imaging Precision
Enhancing stereo imaging in your mix can create a more immersive and expansive listening experience. Start by utilizing stereo widening techniques to enhance the spatial perception of your tracks. These techniques can give your mix a wider soundstage, making it feel grander and more engaging.
Use stereo imaging tools like stereo enhancers and wideners to experiment with placement and depth. Pay close attention to the center image to guarantee defined vocals and instruments. A balanced center keeps the mix cohesive and prevents it from sounding scattered.
Mid-side EQ is a powerful tool for adjusting the stereo width. By manipulating the mid (center) and side (peripheral) elements separately, you can enhance or reduce the width as needed while keeping the core elements focused.
Mono compatibility is essential. Regularly check how your stereo-imaged mix translates to mono playback systems. This ensures that your mix maintains its integrity, no matter where it’s played.
Proper stereo imaging techniques will transform your mix, offering a wider soundstage, better spatial perception, and defined vocals, creating a professional and polished final product.
Harmonic Distortion Management
Just as stereo imaging can elevate your mix’s spatial perception, managing harmonic distortion effectively can add warmth and character to your sound.
By using saturation plugins, you can emulate the analog warmth that many producers love. However, it’s important to control your distortion levels to avoid an overly saturated or muddy mix.
Here are some advanced techniques for managing distortion:
- Choose the Right Saturation Plugin: Each plugin has its own unique flavor of harmonic distortion. Experiment with different ones to find the perfect fit for your track.
- Adjust Distortion Levels Carefully: Start with subtle settings. Gradually increase the levels to add warmth without overwhelming the original sound.
- Focus on Frequency Ranges: Different frequency ranges react differently to distortion. Apply it selectively to avoid clouding important elements like vocals or drums.
- Aim for a Balanced Mix: Constantly A/B your mix with and without distortion. This helps guarantee that the added harmonic content enhances rather than detracts from the overall balance.
Managing distortion effectively involves understanding how audio saturation affects your mix. By following these steps, you can add that desired analog warmth while maintaining a balanced mix.
Common Mistakes to Avoid
One of the most common mistakes in mixing and mastering is over-compressing tracks, which leads to a loss of dynamic range and a flat, lifeless sound. When you over-compress, you squash the natural peaks and valleys in your audio, stripping it of its energy.
Another frequent mixing mistake is using excessive reverb and delay. While these effects can add depth and space, too much can muddy your mix and reduce clarity.
Proper gain staging is essential. If you neglect it, you risk clipping and distortion, making your mix sound unprofessional. Ensuring each track is at an ideal level before adding effects is vital to maintaining headroom and avoiding unwanted noise.
Mixing in an untreated room is another pitfall. An untreated space can lead to inaccurate sound representation, causing you to make poor decisions. Acoustic treatment helps you hear the true balance of your mix, leading to better results.
Lastly, don’t forget to reference other tracks during your mixing process. Not doing so can result in a loss of perspective. Referencing tracks helps you maintain the quality and consistency of your mix, ensuring it stands up to professional standards.
Mix Referencing

To guarantee your mix aligns with professional standards, you should use mix referencing to compare your work with a high-quality track in the same genre. Mix referencing involves using a professional reference track to make sure your mix meets industry standards regarding balance, EQ, dynamics, and overall sound.
Here’s how to effectively implement mix referencing in your process:
- Choose a Professional Reference Track: Select a track in the same genre and style as your mix. It should exemplify the sound quality you want to achieve.
- Level Matching: Adjust the volume of the reference track to match the level of your mix. This allows for a fair and accurate comparison without being misled by differences in loudness.
- Analyze Balance and EQ: Compare the balance of elements (such as vocals, drums, and bass) and use EQ adjustments to align the tonal quality of the reference track.
- Check Dynamics: Make sure your mix has similar dynamic characteristics to the reference. This includes consistent levels across sections and appropriate punch and clarity.
Transition to Mastering
Moving on to mastering signifies the pivotal step of converting your mix into a polished, distribution-ready product. At this stage, you or a mastering engineer will use a digital audio workstation (DAW) to fine-tune the overall sound of your track. This involves optimizing levels, ensuring the frequency spectrum is balanced, and applying dynamic control to enhance the final product’s impact.
During mastering, you’ll employ audio effects like EQ, compression, saturation, and limiting. These tools help to refine the mix, adding clarity and punch, while also ensuring consistency across different playback systems. EQ adjusts the tonal balance, compression smoothens out dynamic range, and limiting prevents any distortion by capping peak levels.
Spatial qualities are another focus in mastering. Techniques like stereo widening can give your track a broader, more immersive feel, enriching the overall sound.
The goal of this final step is to create a cohesive sound that translates well whether it’s played on high-end headphones or a car stereo.
Final Touches
Wrapping up the mastering process, final touches add those subtle enhancements that can make your track truly shine. Mastering engineers focus on these last steps to guarantee your mix sounds polished and cohesive. It’s all about fine-tuning to achieve a professional end result without over-processing the audio.
Here are four key final touches that deserve your attention:
- Fine-tune EQ Settings: Adjusting the EQ can bring out the best qualities in your mix, making each element sound better and more balanced. Pay attention to any frequencies that need slight boosts or cuts.
- Adjust Overall Loudness: Assure your track meets industry loudness standards while preserving its dynamics. This step involves careful compression and limiting to achieve a consistent level without distortion.
- Add Depth with Reverbs and Delays: Subtle use of reverb and delay can add depth and space to your mix, making it sound more immersive. Be cautious not to overdo it, preserving the clarity of your original mix.
- Attention to Detail: Scrutinize every element of your mix and master for any imperfections. This includes checking for clicks, pops, and ensuring smooth transitions.
These final touches might seem minor, but they’re essential for achieving a polished, professional track that stands out.
Next up, learn more about how to arrange music in this guide.
