When tuning drums, you need to start by centering and preparing the drum head, ensuring it’s clean and evenly stretched. You’ll want to tighten the tension rods in a diagonal pattern to prevent warping and maintain even tension. Press down on the drum head and smooth it outwards to set a stable foundation for a clear sound. Begin with the resonant head, then move to the batter head, using a star pattern for consistent pitch. Choosing the right drum key and adjusting incrementally is essential. Ready to explore the nuances of fine-tuning and achieving that perfect tone?
TL-DR
- Center and Prepare the Drum Head: Ensure the drum head is centered and residue-free for optimal sound quality.
- Tighten Tension Rods in Star Pattern: Use a star pattern to evenly tighten tension rods, preventing warping and ensuring balanced tone.
- Utilize a Drum Key for Precision: Select the right drum key to achieve precise tuning and maintain even tension across the drum head.
- Adjust Tuning for Genre: Tailor tuning to your musical genre, with different settings for rock, jazz, metal, and pop.
- Apply Dampening Techniques: Use gels, rings, or a wallet to control overtones and achieve a cleaner, more focused sound.
Necessary Tools for Drum Tuning
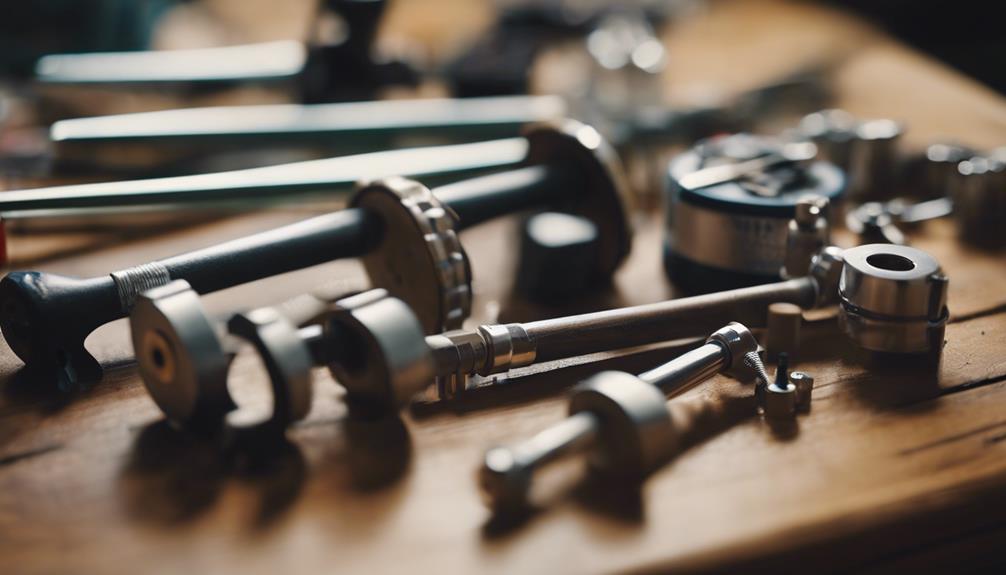
To get started with drum tuning, you’ll need essential tools like a drum key and a drumstick. The drum key is vital for adjusting the tension rods that hold the drum head in place. By turning these rods, you can fine-tune the pitch and overall sound of your drum. A drumstick comes in handy for tapping on the drum heads, helping you gauge the drum’s sound as you adjust the tension.
Using two drum keys simultaneously can guarantee equal tension across all the lugs, promoting a more balanced sound. Professional drum techs often employ a turntable for easy rotation, allowing for more precise tuning without constantly repositioning the drum.
Besides tuning, the drum key is also versatile for adjusting hardware components like hi-hat stands and kick drum pedals. This makes it a multi-purpose tool that no drummer should be without.
Proper centering and tensioning of the drum head are essential. If the drum head isn’t centered correctly, you’ll struggle to achieve the desired sound, no matter how much you adjust the tension rods.
Follow these guidelines, and you’ll be well on your way to a perfectly tuned drum set.
Anatomy of a Drum
When you start tuning your drums, it’s essential to know the parts that make up the drum shell, head, and hoops.
The components like hoops, tension rods, lugs, and claws all play a role in producing sound.
Drum Shell Components
The drum shell, the core structure of the drum, houses the drumheads and is essential for producing its unique sound. When you look closely at a drum, you’ll notice several components that work together to achieve this.
The drum shell itself is the main body where everything is mounted. Attached to this shell are the tension rods, which hold the drumheads in place. These rods are tightened or loosened with a drum key, allowing you to adjust the tension and tuning of the drum.
Lugs are another crucial component. They’re attached to the shell and serve as the anchor points for the tension rods. The lugs help secure the drumheads firmly to the drum shell, ensuring that everything stays in place.
Hoops, which sit on the outer edges of the drumheads, and claws, which connect the hoops to the tension rods, provide additional stability and support.
Each of these components—drum shell, tension rods, lugs, hoops, and claws—plays an essential role in the drum’s overall performance. Understanding how they interact helps you achieve the perfect sound, giving you control over your instrument’s tonal quality and resonance.
Head and Hoops
Ever wondered how the head and hoops contribute to a drum’s sound and performance? The head, also known as the drum skin, is stretched over the shell and is essential for sound production. When you strike the head, it vibrates, creating sound waves. Different types of heads can greatly impact the tone and durability of your drum, so choosing the right one is important.
Hoops play a critical role in this setup. They secure the drum head onto the shell and are necessary for maintaining the necessary tension. Without the hoops, the drum skin wouldn’t stay in place, and you wouldn’t be able to achieve the desired sound quality.
The tension rods, which are threaded through the hoops and attached to lugs on the shell, allow you to adjust this tension. By tightening or loosening these rods, you can fine-tune the pitch and tone of the drum.
Understanding the anatomy of a drum, specifically the head and hoops, is essential for proper tuning and maintenance. By paying attention to these components, you can make sure your drum sounds its best and remains in good condition for longer periods.
Preparing Your Drum Head
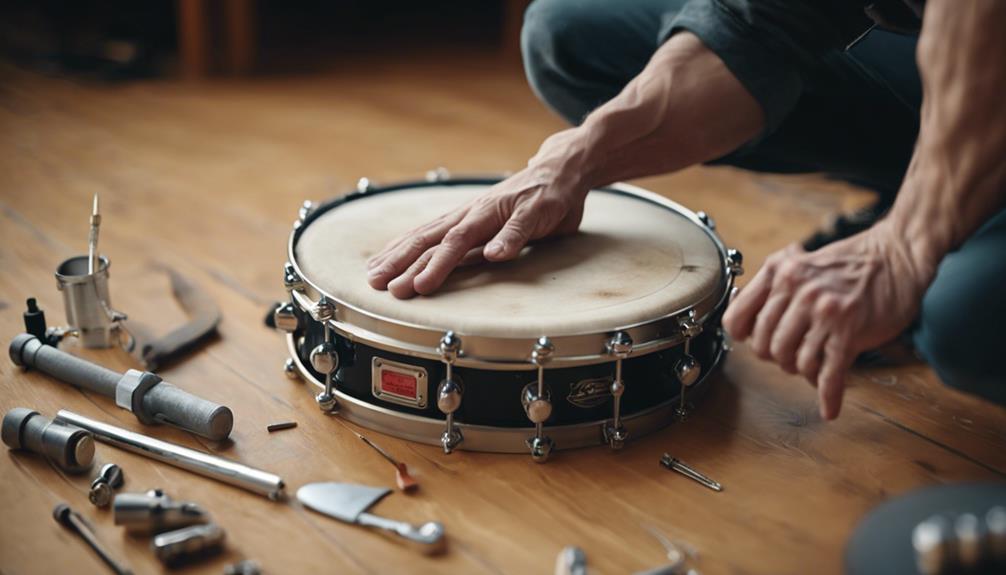
Start by centering the new drum head on the shell to guarantee even tension and a balanced sound. First, remove any residue from the old drum head on the shell. This promotes a clean surface for the new head, fostering better contact and resonance. Align the drum head with the bearing edge of the shell carefully. Proper alignment is essential for the best tone and response.
Next, press down gently on the center of the drum head to stretch it out and remove any wrinkles. This step helps to make sure that your drum head will sit flat and even, providing a more consistent sound.
Now, place the hoop over the drum head and start inserting the tension rods. Begin tightening the tension rods by hand to secure the drum head in place. Then, use a drum key to tighten the rods further. It’s crucial to follow a diagonal pattern when tightening the rods to ensure even tension across the drum head. This method prevents warping and maintains a balanced sound.
Tighten each rod gradually and equally, checking for any unevenness as you go. This preparation sets the stage for a well-tuned drum.
Centering the Drum Head
Before tightening, make sure you center the drum head by aligning the logo with the drum’s badge. This step is essential for achieving an even tension and a balanced sound across the drum head. Centering the drum head properly not only guarantees optimal sound quality but also maintains the drum’s aesthetic appeal.
Start by placing the drum head on the shell, making sure the logo or print lines up perfectly with the drum’s badge. This alignment helps you visually confirm that the head is centered. Misalignment can lead to uneven tension when you start tightening the tension rods, which negatively affects the overall sound quality.
Take your time to adjust and reposition the drum head until it sits evenly around the shell. A centered drum head allows for even distribution of tension across all tension rods, contributing to a balanced sound. Skipping this step or doing it hastily can result in a drum that sounds off, no matter how well you later tune it.
Tightening Tension Rods

When tightening tension rods, you’ll want to use a drum key and follow a diagonal pattern to guarantee equal tension.
This method prevents any warping and keeps the drum head centered, which is crucial for a balanced sound.
Consistent tension across all rods will help you achieve a clear and resonant tone.
Proper Tension Sequence
To guarantee even tension across the drum head, tighten the tension rods in a star or crisscross pattern. Start by finger-tightening all the tension rods to make sure they’re secure but not overly tight. This preliminary step sets the stage for precise adjustments using your drum key.
When you begin drum tuning, use the drum key to gradually increase tension on each rod in small increments. This method helps maintain even tension across the drum head and avoids any uneven stretching that can negatively impact the sound.
As you make these adjustments, tap on the drum head near each tension rod. This helps you listen for differences in pitch, indicating which areas need further tweaking.
It’s essential to aim for a consistent pitch around the entire drum head. You can use a tuning app or tool for more precise measurements, ensuring each rod is tightened to the same tension. This will help achieve a balanced, harmonious sound.
Following this sequence and making adjustments in a controlled manner will provide the best results for your drum tuning efforts, making sure your drum sounds its best.
Equal Tension Balance
Achieving equal tension balance is essential for ensuring your drum produces a clear and consistent sound. To start, you’ll need a drum key to adjust the tension rods.
Begin by tightening the rods in a star or crisscross pattern. This method helps maintain equal tension across the drum head, preventing any warping or uneven stretching.
When you tighten the tension rods diagonally, you distribute pressure evenly around the drum. This approach avoids over-stressing specific areas, which can lead to inconsistent sounds. Use the drum key to make small, incremental adjustments. As you tighten each rod, listen carefully to the pitch and feel the tension under your fingers. Aim for consistency in both.
After completing the initial tuning, go around the drum one more time to fine-tune the tension rods. This ensures that each rod is equally tightened, contributing to an overall balanced tension.
Equal tension balance is important for a well-tuned drum. It allows your drum to produce a clear, resonant sound that’s consistent across all playing areas. Remember, patience and precision are key to perfecting your drum tuning process.
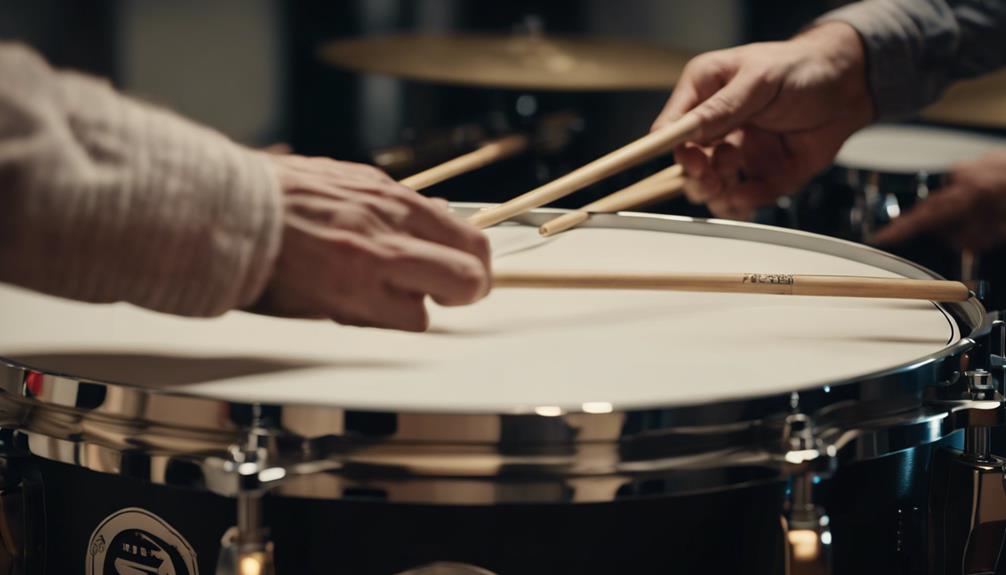
Stretching the Drum Head
Pressing down on the center of the drum head and smoothing outwards eradicates wrinkles and guarantees even tension. When you stretch the head effectively, you help the drum head settle properly, which is essential for maintaining tuning stability. Start by placing your palm firmly in the center and gradually apply pressure while moving towards the edges. This method ensures you remove wrinkles and achieve even tension across the drum head.
Proper stretching is important to avoid any warping or damage. It’s necessary to stretch the drum head evenly to maintain its integrity and longevity. By ensuring even tension, you’re setting the foundation for a balanced and clear sound. Drum heads that aren’t stretched correctly can lead to tuning inconsistencies, which can be frustrating during a performance or recording session.
Take your time with this process. The goal is to allow the drum head to adjust and settle into place. After stretching, give it a few minutes to relax before you begin tuning. This step is crucial for achieving the best possible sound quality from your drums.
With proper stretching, you’ll find your drum tuning experience smooth and efficient.
Tuning the Resonant Head
After ensuring the drum head is properly stretched, focus on tuning the resonant head for best sound quality. Begin by loosening all the tension rods on the resonant head and removing it from the drum shell. Take this opportunity to clean the drum shell and check for any damage or debris. Position the new resonant head carefully, making sure it’s centered on the drum shell to avoid uneven tension later on.
Next, start tightening the tension rods in a star pattern. This means tightening one rod, then moving directly across the drum to the opposite rod, and so on, until all rods have been snugged up. Using a drum key, continue tightening the rods gradually, ensuring even tension across the resonant head. It’s important to tighten each rod a little bit at a time rather than fully tightening one before moving to the next. This method helps maintain even tension and prevents the head from becoming lopsided.
As you tighten, periodically check for wrinkles or uneven spots. Your goal is to achieve the desired pitch for the resonant head, which will greatly impact the overall sound of your snare drum. Take your time to make adjustments until the head is evenly tensioned and tuned to perfection.
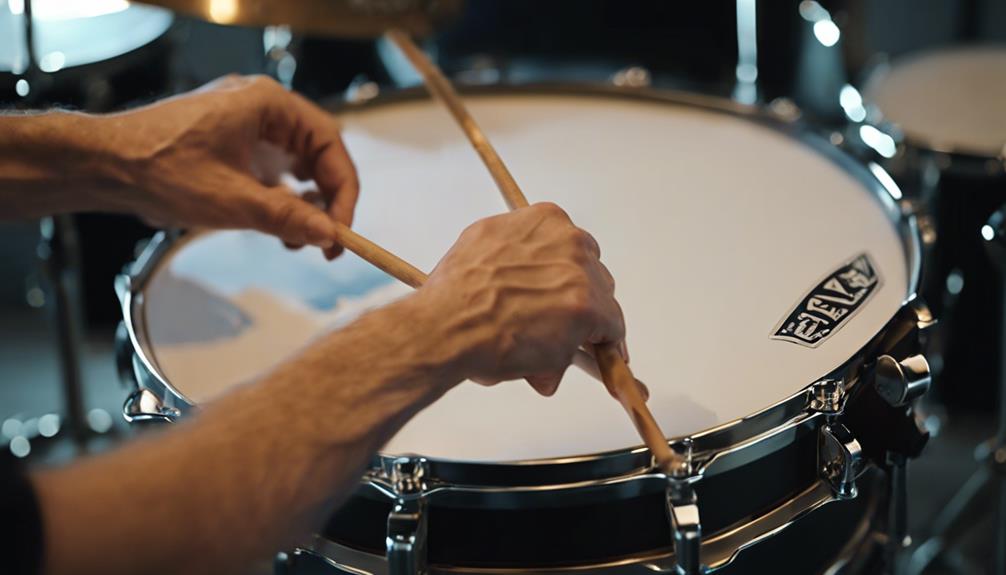
Tuning the Batter Head
When tuning the batter head, start by choosing the right drum key for your tension rods.
Adjust each rod in a star pattern to maintain even tension across the head.
This will help you achieve a balanced pitch and enhance the drum’s overall sound.
Choosing Drum Key
Selecting the right drum key is crucial for achieving precise tuning on your batter head. This specialized tool is designed to adjust the tension rods that secure the drumhead, enabling you to fine-tune the pitch and resonance.
Whether you’re using a T-shaped, square, or ergonomic drum key, the goal is to guarantee even tension across the batter head, the top drumhead struck by your drumsticks.
When you use a drum key, you’ll want to adjust each tension rod in a star pattern. This method helps distribute pressure evenly, preventing any warping or uneven tuning that could impact your drum’s overall sound.
The drum key allows for accurate adjustments, making it easy to dial in the desired tones whether you’re going for a high-pitched crack or a deep, resonant thud.
Tension Rod Adjustment
Adjusting the tension rods on the batter head is vital for achieving the perfect drum sound. Start by using your drum key to make adjustments. Tightening the tension rods in a star or crisscross pattern guarantees even tension across the batter head. This method helps prevent warping and uneven tuning, which can negatively impact your drum’s sound quality.
After you’ve made initial adjustments, tap near each tension rod to identify any areas needing further tuning. Listen carefully to the pitch produced by each tap, and adjust the tension rods accordingly.
Here are some key steps to follow:
- Use a drum key to turn the tension rods.
- Tighten in a star or crisscross pattern for even tension.
- Tap near each tension rod to check for pitch consistency.
- Fine-tune the batter head by making small adjustments.
- Aim for the desired pitch for the best sound quality.
Continue this process until the batter head reaches your desired pitch. Remember, fine-tuning is essential. Small adjustments can make a big difference in achieving the perfect sound. By following these steps, you’ll make sure your drum is tuned properly and ready for any performance.
Equalizing Head Tension
To achieve a balanced and consistent sound, start by tapping each lug to identify any uneven tension on the batter head. Listen carefully to the pitch and tone produced near each lug. If you notice discrepancies, it’s time to make adjustments.
Grab your drum key and begin the process of equalizing head tension. Use the drum key to adjust the tension rods in a star pattern. This method guarantees even tuning by applying balanced pressure across the drum head. Tighten each lug incrementally, turning each tension rod by small amounts to maintain balance.
As you proceed, frequently check the pitch and tone by tapping near each lug again. You want each lug to produce a consistent pitch and tone. If some lugs sound higher or lower than others, make further adjustments with the drum key, always following the star pattern.
Repeat this tuning process until all lugs produce a uniform pitch and tone. Remember, patience is key. The goal is to achieve an even tuning that allows the drum to resonate properly, providing you with a balanced and pleasing sound.
Fine-Tuning Your Drum
Fine-tuning your drum means making small adjustments to achieve the exact pitch and tone you want. To tune your drum kit, start by listening carefully to the sound each drum produces. Make sure it matches your musical preferences. Use a drum key to make precise adjustments to the tension rods, which control the tightness of the drum heads. This will help you achieve the desired pitch and balance across your drum kit.
Here are some steps to help you fine-tune your drums:
- Tap around the head: Lightly tap around the drum head near each tension rod to hear the pitch at different points.
- Adjust in small increments: Use the drum key to make small adjustments, turning each tension rod a quarter turn at a time.
- Check for even tension: Ensure that the tension is evenly distributed across the drum head to avoid unwanted overtones.
- Listen for the sweet spot: Find the best pitch where the drum sounds most resonant and clear.
- Play and adjust: Once you think you’ve got it, play the drum within the context of your kit and make any final tweaks.
Regular fine-tuning will keep your drums sounding consistent and performing at their best.
Drum Tuning Tips
Once you’ve mastered fine-tuning your drums, let’s explore some tips and techniques to further refine your drum sound for different genres and preferences.
Start by experimenting with different tuning ranges. For rock, you might want a low-pitched, punchy sound, while jazz often calls for higher, more resonant tones. Adjusting the batter and resonant heads on your snare can greatly change your overall drum sound.
When you tune a drum, don’t forget dampening techniques. Using gels, rings, or even a wallet on your snare can help control overtones and focus the sound. Genre-specific characteristics are essential.
In metal, tighter tuning with more attack may be desired, whereas pop music often benefits from a balanced, clear tone. Additionally, the modern drum set offers versatility. Try various drum heads; coated heads can provide warmth, while clear heads might give you more attack.
Adjust the pitch ranges of your toms and kick drum to complement the snare and create a cohesive sound.
Drum Tuning Charts
Drum tuning charts are invaluable tools that guide you in achieving the perfect pitch for each drum. These charts provide visual aids for tuning drums to specific pitches, making the process straightforward, especially if you’re new to drumming.
Using a drum tuning chart, you can easily see the recommended tension settings for each lug. This guarantees that your drum is tuned consistently and achieves balanced tuning. Here are some reasons why you should consider using drum tuning charts:
- They help beginners achieve consistent and balanced tuning.
- They provide specific pitches and tension settings for different drum sizes and types.
- Advanced drummers can customize charts based on their preferences and playing style.
- They simplify the tuning process, saving you time and effort.
- They offer a visual reference, making it easier to understand and follow.
Drum tuning charts can vary depending on the drum size, type, and the sound you’re aiming for. For advanced drummers, creating custom tuning charts allows you to fine-tune your setup to match your unique style and preferences. Whether you’re a beginner drum enthusiast or an experienced player, these charts are essential in achieving the sound you desire.
Next up, learn how to practice drums effectively in this guide.