To start your journey in drumming, you’ll first need to choose the right equipment that suits your needs and preferences. This involves selecting drumsticks, a drum kit, and any additional accessories. Once you’ve got your gear, setting up your drum kit properly is key to ensuring comfort and efficiency. Next, mastering basic stick grip techniques, such as matched and traditional grip, will lay the foundation for your skills. But it’s not just about holding the sticks correctly; understanding basic rhythms and practicing simple beats will be your next steps. Ready to explore more?
TL-DR
- Learn basic stick grip techniques like matched grip and traditional grip for better control.
- Start practicing simple beats slowly to focus on timing and coordination.
- Set up your drum kit ergonomically to ensure comfort and efficiency.
- Practice integrating basic drum fills into your beats for smoother transitions.
- Drum along with songs to improve consistency, precision, and practical application.
Choosing the Right Equipment

When you’re choosing the right equipment, think about the type of music you want to play. Different genres require different drum set components. For example, jazz might call for lighter cymbals, while rock demands heavier ones. Your drum set should be tailored to the style of music you’re passionate about.
Quality is key. Investing in reputable brands guarantees your equipment will have the sound and durability you need. Poor quality drums and cymbals can hinder your progress and frustrate you. You don’t want to replace your gear frequently, so make sure to buy quality.
Comfort is also essential. Make sure the drums and cymbals are properly sized. This is especially important for beginners who might struggle if the equipment is too large or too small. Balance your setup to ensure you can easily reach everything with one hand, left hand, and right hand. This will help you play more efficiently and comfortably.
Setting Up Your Drum Kit
When setting up your drum kit, start by ensuring each component is within easy reach and at a comfortable height. Position your stool so your thighs are parallel to the ground, and adjust your drums and cymbals for best placement.
Don’t forget essential accessories like your bass drum pedal and hi-hat, which should be positioned for efficient and fluid playing.
Drum Kit Components
Setting up your drum kit properly is crucial for both comfort and performance. To start, position the bass drum directly in front of you, with the pedal facing your dominant foot. This guarantees you can play one of the most critical components with ease.
Next, adjust the hi-hat cymbals so they’re within comfortable reach of your non-dominant hand. Proper height and angle are key, as you’ll be using these frequently.
Place the snare drum between your legs at a height where your dominant hand can strike it comfortably. This drum is central to many rhythms, so it should be easily accessible.
Arrange the toms around the kit, typically above the bass drum and to the right side of the snare drum, ensuring they’re within easy reach.
Your crash and ride cymbals should be set up within reach of your drumsticks. Position them at a height and angle that allow for easy striking to maintain fluidity while playing.
Optimal Drum Placement
To achieve the best drum placement, make sure each component of your drum kit is within easy reach and set at appropriate heights and angles. Proper drum kit ergonomics are essential for maintaining an efficient and comfortable playing position, which allows you to play more effectively and reduce the risk of injury.
Here’s a quick guide to setting up your drum kit:
- Snare Drum: Position the snare drum between your knees, slightly tilted toward you, and at a height where your drumsticks naturally fall when your arms are relaxed.
- Hi-Hat: Place the hi-hat to the left of the snare drum, close enough so you can reach it comfortably with your left hand and foot.
- Bass Drum: Position the bass drum directly in front of you, ensuring your foot can comfortably reach the pedal without overextending.
- Toms and Cymbals: Arrange the toms and cymbals in a semi-circle around you, within a comfortable reach to minimize excessive arm movement.
Essential Drum Accessories
A well-equipped drum kit isn’t complete without essential accessories that improve your playing experience and guarantee everything stays in place. First, consider your drum stool. Position it at a height where your knees form a 90-degree angle. This setup ensures comfort and stability, allowing you to maintain proper posture during long sessions.
Next, focus on pedal tension. Adjust the bass drum pedal so it feels comfortable and responsive. The tension should match your playing style, whether you prefer a tight or loose feel. Proper pedal tension helps you achieve the desired bass drum sound and control.
Cymbal heights are important for smooth progression and ease of play. Set the hi-hat cymbal so your foot can comfortably reach the pedal. The snare drum should be at a height where your wrists remain straight when striking it, preventing strain and promoting fluid motion.
Angle the toms and cymbals to suit your reach and style, ensuring they’re easily accessible.
Basic Stick Grip Techniques
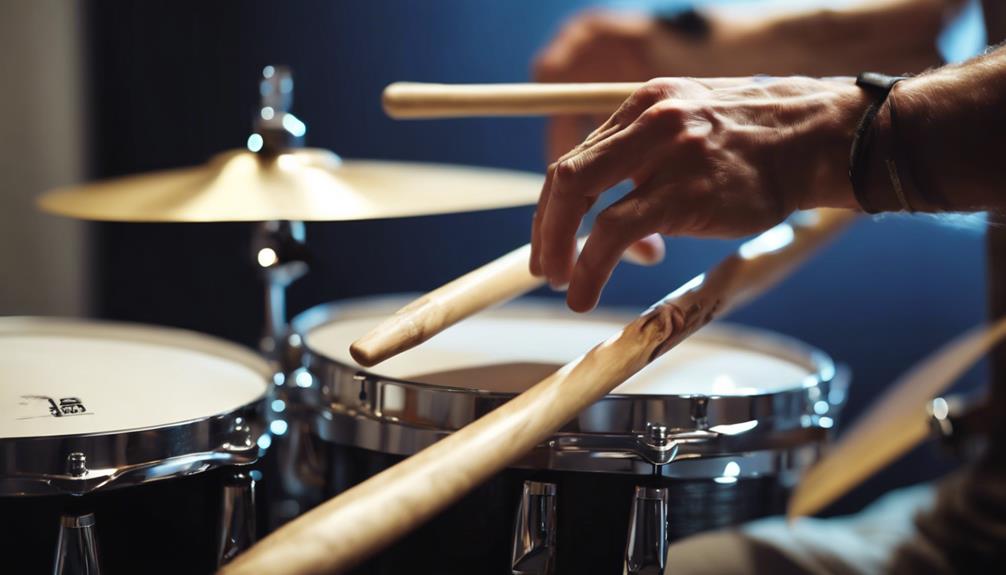
When learning basic stick grip techniques, you’ll start with the matched grip and traditional grip. The matched grip has you holding both sticks the same way, palms facing down, providing balanced control.
In contrast, the traditional grip involves a different hold for each hand, offering unique advantages for various styles.
Matched Grip Fundamentals
In learning the matched grip, you’ll hold both drumsticks with your palms facing downwards, promoting consistent technique and control. This grip is vital for drummers, providing uniformity and balance across both hands. Let’s break down the fundamentals to help you master this technique.
- Stick Control: Start by forming a fulcrum with your thumb and index finger. This pivot point is essential for maintaining control and balance of the sticks.
- Wrist Technique: Use your wrists to generate most of the motion. Flexibility and strength in your wrists will help you play with precision and speed.
- Finger Placement: Your other fingers should wrap gently around the stick, providing support without excessive tension. Adjust finger placement and pressure to achieve different dynamics and tones.
- Consistency: Practice regularly to develop muscle memory. Regular practice ensures that both hands work seamlessly together, enhancing your overall drumming capability.
Traditional Grip Basics
You’ll find that traditional grip offers a unique way to hold your drumsticks, enhancing control and finesse in your playing. This grip is especially common in jazz, orchestral, and traditional drumming styles due to its ability to facilitate intricate and nuanced movements.
To start, let’s explore the history origins of this technique. Traditional grip dates back to military drumming when drummers needed a method to play comfortably while marching, as drum slings positioned the drum at an angle.
For proper finger positioning, hold your left stick between your thumb and index finger, creating a V-shape. Your thumb should rest on top of the stick, while the index finger supports the side. Your remaining fingers wrap loosely around the stick, allowing for subtle control. The right hand typically uses a matched grip, but you can explore grip variations to find what feels most natural.
Practicing traditional grip regularly will help you build muscle memory and dexterity. It might feel awkward initially, but with persistence, you’ll notice improved finesse in your drumming.
Understanding Basic Rhythms
Mastering basic rhythms is essential for any drummer aiming to build a strong musical foundation. When you start, focus on understanding drumming patterns and rhythm variations. Begin by counting evenly to eight while playing the hi-hat on all eight counts. Hit the snare drum on counts 3 and 7, and stomp the bass drum on counts 1 and 5. This simple exercise helps you internalize the beat structure and develop a steady groove.
Incorporate these steps to enhance your rhythm skills:
- Practice Drumming Patterns: Begin with basic patterns and gradually introduce rhythm variations to keep your practice sessions interesting.
- Adjust Tempo Changes: Experiment with different tempo changes to improve your timing techniques. Start slow and gradually increase the speed.
- Focus on Groove Development: Work on maintaining a consistent groove. Pay attention to how each component of your drum set contributes to the overall beat structure.
- Integrate Drum Fills: Use drum fills to release tension or build anticipation in your music. Practice alternating strokes for eight notes on different drums to add variety.
Practicing Simple Beats

How do you start building a solid foundation for drumming?
Start by setting up your drums so everything is within easy reach. Begin practicing at a slow tempo. This helps you focus on timing and improving coordination. Count evenly to eight in your head or out loud to establish a rhythm foundation. On all eight counts, play the hi-hat. Hit the snare drum on counts three and seven, and stomp the bass drum on counts one and five. This creates a basic beat that you’ll build upon.
Once you’re comfortable with this pattern, practice combining these elements into a simple rock beat. Focus on your coordination and timing until you can play comfortably without counting. As you get more confident, try drumming along with songs like AC/DC’s ‘Back in Black.’ This will help you apply your skills in a musical context and enhance your sense of groove.
To take your drumming to the next level, start adding dynamics. Vary the volume of your hits to give your beats more expression and life. Keep practicing at a slow tempo, gradually increasing speed as you improve. Remember, consistency and precision are key to mastering simple beats.
Introducing Drum Fills
Drum fills inject excitement and creativity into your drumming by breaking up repetitive beats and adding flair. They’re essential for adding variation and keeping your audience engaged. To get started with drum fills, focus on experimenting with different drums and cymbals to create dynamic patterns. This will enhance your filling dynamics and make your playing more expressive.
When practicing drum fills, follow these steps:
- Start Simple: Begin with basic fills that use only a few drums. This helps you get comfortable with the concept without overwhelming yourself.
- Alternate Strokes: Use alternating strokes on different drums to create creative patterns. This keeps your fills interesting and varied.
- Smooth Integration: Practice integrating your fills smoothly into your beats. This ensures your shifts are fluid and your drumming doesn’t sound disjointed.
- Experiment: Try different fill variations and placements within your beats. This will help you develop your unique drumming style.
Next up, learn about beginner drum rudiments in this guide.